Modular Synthesis, LLC
Custom Electronics and Repair

I spent 34 years at Tektronix working in  all parts of the company - computer graphics, video and networking, and test and measurement (my professional information is on my LinkedIn page).  I've since retired to enjoy my hobbies and I now have the time to devote to my music projects.  I have the time and interest to be able to help and assist fellow Synth-DIY'ers with their projects and formed Modular Synthesis, LLC to help.  I am on www.getrecommended.com

Many of the items that are sent to me for repairs are old and have limited or no technical documentation.  Some of the parts are unobtanium or fragile.  If parts are not available, I may be able to modify the design to use different parts.  However, when I am working on a vintage repair, one of four things can happen:

1. I can work on it and am unable to repair it.

2. I can work on it and something else can go wrong.

3. I can work on it, repair it, return it, and it can break again, possibly soon.

4. I can work on it, repair it, and it will work fine.

I have had only two products that I have been unable to repair and they were both mine.  One is my second Peavey DPM-C8 with a lot of PCB damage.  I haven't given up yet but need to ohm out the entire PCB.  The other was a keyboard with flex circuits that deteriorated.  I managed to repair some of them with silver conductive paint but decided it just wasn't worth the effort to complete.  I do keep you informed via email of my progress and you can direct my repairs to minimize cost.

For DIY repairs, the number one problem I find is soldering issues - unsoldered pins, incomplete soldering, or solder bridges.  You have to wash and carefully inspect every pad with magnification to find these.  I have added tips and information on my Modular Synth Tips page for soldering, cleaning, and inspecting PCBs as well as proper packing for module shipment.  Hopefully these tips may save you some time and grief.  Unfortunately I also encounter design errors and insufficient margin as well.  These do take more time to find and correct.

This service is my "hobby" and my low rate of $35/hour is to give back to the community.  So, I am not interested in the following:

A. Don't buy a basket case item that is rare and valuable so you can have me restore it and with my rates you come out ahead.

B. Don't have me build you a module so you can then turn around and sell it.

C. Don't have me repair your broken stuff so you can immediately sell it.

D. If I design you something custom I give you the documentation so you can maintain it.  Don't give my designs away or make them public.

I will sometimes do builds. I prefer to have you source most/all of the parts. I no longer will do large builds (Buchla 208, 212, 248, etc.) as with age comes physical issues with significant repetitive hand motions.


Items not paid for or no communications for 30 days after a repair is completed, unless previously arranged, will be considered abandoned. I reserve the right to sell abandoned items to recover my cost of repairs. I'm sorry, but after spending time repairing your item I don't have the space or funds to store your item indefinitely. If you can't afford to have it fixed, don't send it to me.


Contact me if I can consult or be of help or assistance with your project, repair, design, or restoration.


I have recent experience repairing these modules and music equipment: (I've since stopped updating this list ...)

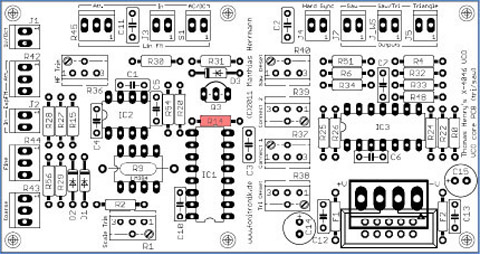
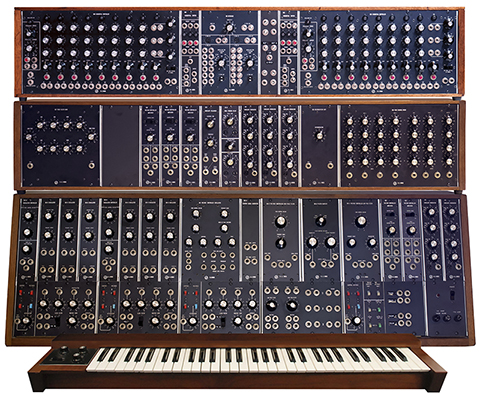
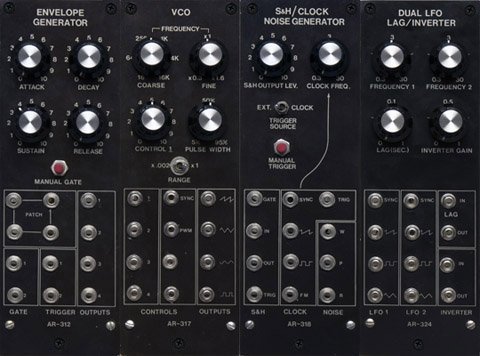
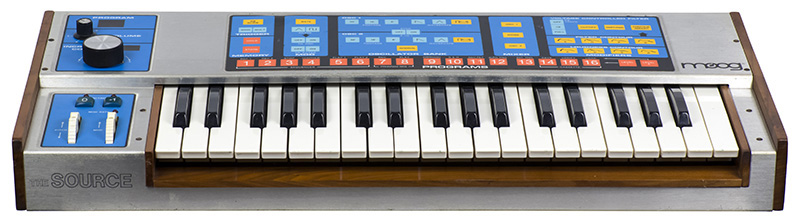
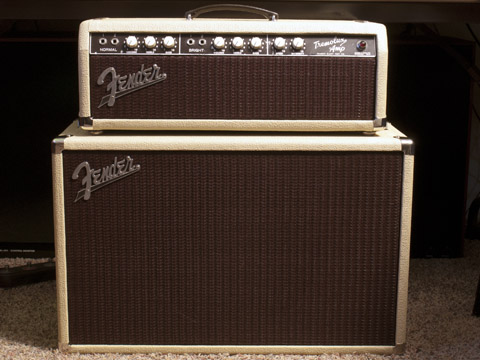
Analog Systems RS-290

Aries AR-312 EG, AR-314 VCF, AR-316 VCA, AR-317 VCO, AR-318 S&H, AR-324 dual LFO, AR-328 spring reverb and output, AR-332 Dual VCO

ARP avatar, odyssey, and sequencer, ARP-4072 clone VCF

ASM-1 VCO option 3

Barton Quad VCA

Blacet time machine

Boss DDR-55 drum machine

Buchla 208 music easel, 216 touch controlled voltage source, 227 system interface, 230 triple envelope follower, 245 sequential voltage source, 258 dual VCO, 259 complex oscillator, 266 source of uncertainty, 277 signal delay, 281 quad function generator, 285 frequency shifter, 291 dual voltage controlled filter, 292C quad low pass gate, 294 comb filter, 296 programmed spectral processor, RSF Kobol dual vco, 402 quad dual lfo

CGS Bi-N-Tic filter, CGS-26 cv processor, CGS-29 wave multiplier, CGS-31 digital noise, CGS-35 Synthacon VCF, CGS-48 VCO, CGS-49 wasp filter, CGS-58 utility LFO, CGS-62 slope detector, CGS-113 wavefolder, CGS-114 dual universal slope generator

Cyndustries QLPG

Digitech MSP-4

Doepfer A-138 matrix mixer

EFM Bassace monosynth

Elby ASDR

Electro Harmonix pedals

EMU Drumulator

Ensoniq EPS-16+ and mirage keyboards

Experience effects pedal

Feedback Modules Two59

Fender most anything vintage ...

Fenix II

Fonitronic MH21 Triple Resonator and ALM003 SID GUTS

Fostex 3180 reverb

Fritz 5pulser, threeler filter, TZ-FM VCO

Greistleizer effects pedal

Hexinverter SimpleSEQ

Jürgen Haible polymoog resonator, tau phaser, vibrato scanner, frequency shifter, variable slope filter/phaser

JVC TT-81, TT-101, and TT-801 turntables

L-1 VC Resonant EQ

Loft 450 delay/flanger

Milton sequencer

"Miss Ten" VCF/VCA

Modcan 4075 VCF

Moog 901 VCO, 901A & 901B VCO, 902 VCA, 903A Noise, 904A, 904B, & 904C VCF, 905 reverb, 907 fixed filter bank, 911 EG, 911-A dual trig, 912 EF, 914 fixed filter bank, 921 VCO, 921A & 921B VCO, 960, 961, & 962 sequencer, 984 four channel mixer, 992 control voltages, 993 trigger and envelope voltages, CP-2, CP-3A, CP-4A, CP-8A, 961CP, 930 power supply, 951 keyboard

Moog Micro, Source and Sonic Six

Oakley SVCO, ADSR/VCA, TB-3030

Oberheim SEM

PAiA 2700 and 4700 modules, MIDI2CV

Papareil Polivoks filter and quantix8

Peavey DPM4 & DPM-C8 keyboards

René Schmitz MS20 filter

Roland RE-301 chorus-echo, 112 2VCO, 140 2ENV-LFO, 172 Phaser Shifter/Audio Delay/Gate Delay

Sequential Circuits Inc model 700 programmer, model 800 sequencer

Serge modules

Sony TA-E88 preamp, TAN-511 amplifier

Sputnik Modular (many modules)

Tellun TLN-156 reverb

Thomas Henry X-4046 VCO

TTSH

Yamaha DX7 keyboard

Yocto TR-808 clone

YUSynth S&H, ARP4072 filter

Wasp synth

Wersi CX-2 rhythm & accompaniment

Wiard JAG

... and of course any modules I have built and my instruments that I have repaired

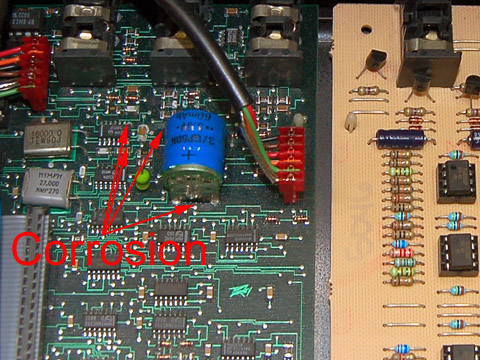
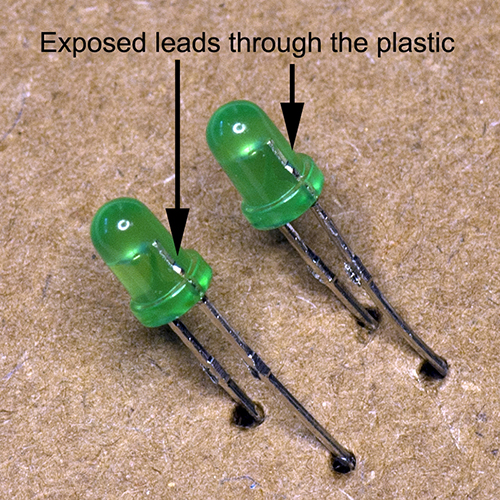
Here is one of my more bizarre repair finds.  This was in a Buchla 25S and the CMOS logic kept failing after a short time.  The leads were not fully encapsulated in plastic and would intermittently short to the panel!


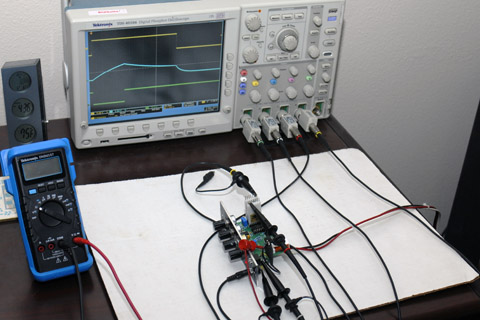
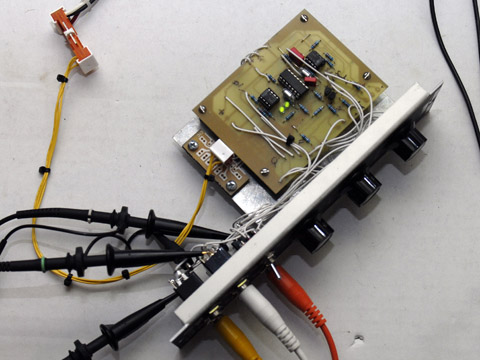
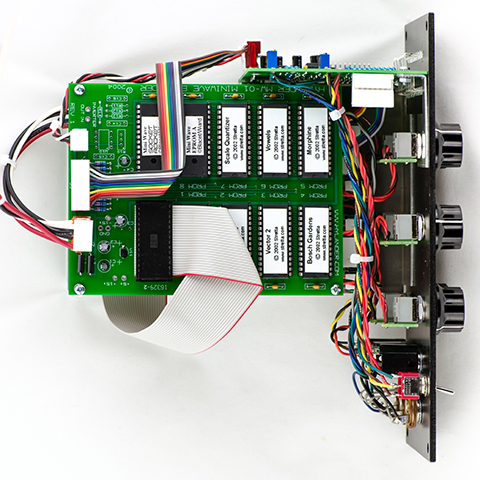
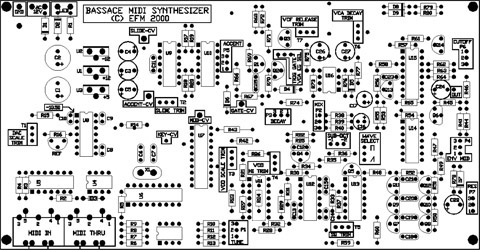
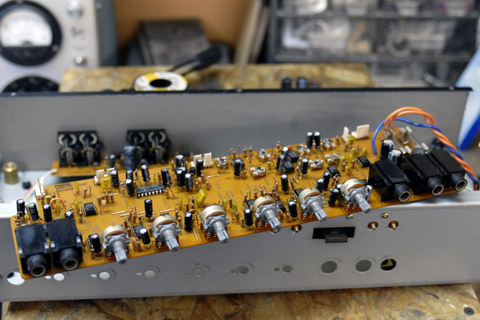
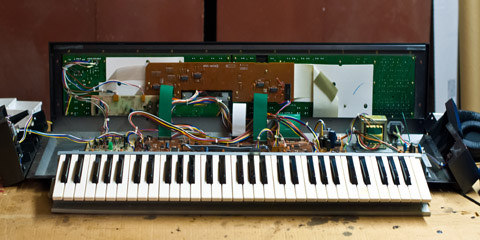
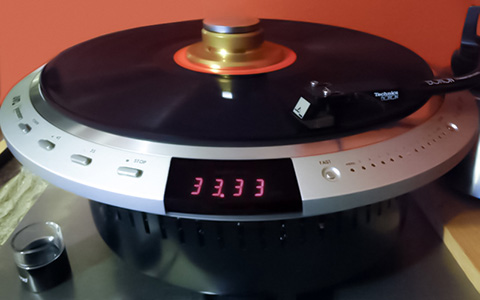
Here are some sample projects that I have helped with.

Synth-DIY Repairs

Project:

Dana requested some help with a Polymoog® Resonator Dotcom-format module.  I made necessary repairs, wired the front panel controls, and verified functionality.  Dana's website is www.danacountryman.com

Quote:

"I'm playing with it now! Pretty cool!  I don't know where I'd have turned without your taking my case on!"
 

Jürgen Haible Polymoog® Resonator in a 2MU Dotcom-format module.
Project: Steve requested help with an Elby ADSR Frac-format module.  I made the necessary repairs and calibrated the module. The output could not be set below 7.5 volts so I adjusted it for 10V and added jumper pins select 10 volts or attenuate to 5 volts.  Steve's website is smcmusic.net
Quote:

"The ADSR came today.  I just tried it out and it works great.  Man, that little mod you did with the resistor and whatever that thing is that enables you to engage the resistor or bypass it is INGENIUS.  How the heck do you come up with this stuff?  Thanks a million."  (Steve is referring to the jumper pins for +5V or +10V output)

  Elby ADSR with the Gate, ADSR output, and flip-flop waveforms.
Project: Todd requested help with a René Schmitz Korg MS20 filter Dotcom-format module.  The frequency range and resonance were not operating correctly.  The resonance problem was due to noise on the power pins.  There are no decoupling capacitors on the PCB so I added them at each IC along with some bulk capacitance on the supply rails.  The frequency range limitation was due to overdriving the OTA inputs which would clamp the output to the supply rail.  I changed the OTA input voltage divider resistors to decrease the signal levels and it now works well and self-oscillates from 66 Hz to over 8 KHz.
 

René Schmitz Korg MS20 VCF in a Dotcom- format panel.


Synth-DIY Builds

Project:

Mark requested a 5U build of the Blacet Miniwave with the Hylander expansion and the Hendry CV select boards.  It also was to go into a slant cabinet so I had to make sure it would have adequate clearance.

Quote:

"Hi Dave – just wanted to tell you, the module arrived today, and I just had a chance to unpack it.

First of all, that was a great packing job – even better than Roger Arrick’s Synthesizers.com packages, and that’s saying a lot. Thanks for the care in packaging and sending it.

Secondly, this thing is really a work of art. What a job you did putting all this together. With all these ROMs, it will certainly be a long time before I can even scratch the surface of what can be done with it.

Thanks again for such great precision work and service! You don’t mind if I post some pics and description on MuffWriggler or similar forums and boast of you a bit, do you?"


5U Blacet Miniwave with Hylander expansion and Hendry CV PCBs.  I made custom brackets so it would fit in a slant cabinet (note the bottom two jacks are open frame for clearance)
Project:  
Quote:


Troubleshooting and Repair by Email

I do offer to help people as I see their posts in various forums and some send me unsolicited requests by email.  I generally can help a successful diagnosis and the individuals are able to make their own repairs.  Photos are critical to examine wiring, soldering and components.  I have diagnosed build problems, component problems, and PCB layout errors all by email.

Project: Ken requested help with his EFM (Electronics For Music) Bassace MIDI synthesizer.  We repaired his monosynth via email.  I asked Ken to make certain voltage measurements around the VCO.  Based on these measurements I isolated the VCO problem to the exponential converter circuit.  I suggested various ways of testing and isolating the faulty component which turned out to be a bad CA3046 transistor array.  Once we got the VCO working it was time to test the VCF, VCA, EG and finally the Slide circuit.  I suggested setups and voltage measurements to take and we worked our way through each circuit correcting faults as we went.  This repair took a lot of emails back and forth to work our way through the entire circuit.
Quote:

"Dave! It's oscillating! You were right a bad transistor array!"

"It's tracking properly now. I'll let you know once I have everything buttoned up but it looks like everything is working!!!!!!

"I wanted to thank you for all your help with all this.  Looking back, there are over 80 emails between you and I.  No one has ever taken this sort of time with me to troubleshoot a project like this and honestly I'm still quite surprised you stayed with me through all this.  It's really, really cool of you.  Without your help I wouldn't have been able to do any of it. I've learned quite a lot in the time we corresponded ... you're quite a teacher."

  EFM Bassace monosynth PCB.
Project: Scott requested help with his Thomas Henry X-4046 VCO using the Fonik PCBWe repaired this VCO via email.  I analyzed the circuit and asked Scott to make specific voltage and audio measurements.  Based on his findings I isolated the fault to a specific sub-circuit and sent Scott another email of components to check.  Scott found the problem and repaired his VCO.  Success by email!
Quote: "It seems R14 was indeed the culprit! I can't thank you enough, I was really at wit's end.  Thanks Dave!"
  Problem R14 component on the Thomas Henry X-4046 VCO.


Vintage Synthesizer Repair and Restoration

Project: I helped this individual by restoring a complete late 1960's Moog modular synthesizer.  I worked on a cabinet at a time and I went through each cabinet, power supply, and module to bring them back to operational condition.  My goal was to make it operational but to leave it as original as possible.  It was a lot of fun to see the vintage Moog come to life.
Quote:

Dave,  this is fantastic.  Thanks for the update on progress and cost.  Getting all the updates via your webpage is perfect in my book :)


Vintage Moog synthesizer restoration
Project: I helped Anthony get his TimeMachine working via email and he requested help with four Aries modules: AR-312 EG, AR-317 VCO, AR-318 S&H, AR-324 Dual LFO.  These were originally built as kits so some had original build errors as well as defective components.  I could not obtain any PCB layout information and some of the parts are in seemingly random locations so tracing the circuit took time.  Luckily the PCB is accessible from both sides.  I created pages for each module with documentation, modifications, and photos.
Quote: Wow, Dave, wow wow wow.  You are amazing.  The level of detail is phenomenal. You could have just said "yeah I had to change a couple parts and now it works" and I would have said "GREAT!"  Thanks again, really, so much, for the work you did. Amazing! I have already recommended you to a friend. (Anthony is referring to the detailed descriptions of what I corrected on each module).
  Four nice vintage and complete Aries modules.
Project: This 1980s German Wersimatic CX-2 Drum & Rhythm Machine with 240V AC mains was quite a project.  The power supply was fried, components burned beyond recognition, cables broken, and it had been modified.  I had no schematics and began on the power supply board which had been previously repaired with wrong components and wrong modifications.  I had to reverse engineer the power supply and determine how to make repairs.  Once the power supply was working I did thermal measurements and determined it was running way too hot.  The owner eventually found a set of schematics (in German) which made the repairs go faster.  I eventually found a 4000 series CMOS part which was consuming 4X worst-case current and was the root cause of overstressing the 15V regulator.  Once the power supply was operational I began backing out other modifications and repairing broken and damaged cables and connectors (this CX-2 must have been worked on by monkeys).  Once I got basic operation restored I returned it to the owner and helped him to do the remainder of the repairs via email.
Quote: "Christmas comes early!!! Fingers crossed that there aren't any more major issues going forward." and later in regards to the email repairs "It's back!!  I got the M3870, popped it in and got all the accompaniment working again!"
 
Project This Moog Source had a number of issues including corroded jacks, ground loop hum, missing display segments, and most importantly the Incremental Controller would only operate one direction after the synth warmed up.  I was hesitant to work on this Moog because of the fragile nature of the membrane keyboard and flex circuit, and the digital logic.  Without proper diagnostics, any issue in the digital logic is hit and miss for repair.  The owner was willing to risk shipment and repair because without the Incremental Controller the synth was pretty worthless.  The repair required some redesign and came out quite nice.  It is documented on my Moog Source page.
Quote: "Arrived. Perfect. Bigger smiles than can be relayed via email. May all your sons and daughters be blessed."
 

Nicely repaired Moog Source


Electronics Repair and Restoration

Project:

Josh requested help with his Fostex 3180 spring reverb.  This is an interesting two channel reverb with BBDs prior to the spring reverb.  It exhibited intermittent noise similar to that of a crackly record.  There was corrosion in the tin connectors and unsealed trimmers so I cleaned all the front panel controls, trimmers, and connectors.  I replaced the power supply electrolytic capacitors, rerouted the main AC wiring away from the spring pickups, and replaced all the gooey foam in the reverb springs.

Quote:

"Dave Brown provided excellent service. The Fostex Spring Reverb sounds 100% better now that it has been cleaned and its power supply re-capped."
 

Fostex 3180 spring reverb.
Project: This broken Casio CZ-3000 needed electronic and mechanical repairs including several inoperative keys and two broken keys.  I repaired the keys by making a cardboard mold for the missing end tang, filling it with epoxy, and machining it to the proper shape.  I replaced the missing key stops by making an aluminum clip which wrapped under the key as seen here.  The repaired keys fit and play perfectly.  This is an interesting keyboard using phase distortion synthesis.  There is a good write-up of the CZ series at Mad Theory and the Electric Druid site has a nice explanation of phase distortion synthesis.
 

Casio CZ-3000 inner electronics. 
Project: I met Byron at the PDX Synth-DIY meet and he requested help with a dead Peavey DPM4 synthesizer. I knew it had a battery on the PCB so thought there would be corrosion damage (see my DPM-C8 repair). We worked on this together and replaced the battery, cleaned up minor surface corrosion, checked continuity on corroded traces, reseated connectors and ICs, and got signs of life with "SYSTEM ERROR:00000000 1111ERR" on the display. Occasionally we could get past this error message and Bryon determined that reseating the low profile keyboard cable connectors was the final fix.
Quote: "No more error on startup; no more sustained tones. I'm able to program it and save patches, so it is completely back to life now!"
  Peavey DPM4 PCB with a leaking dead battery
Project: This individual sent me a JVC TT-101 turntable.  This has to be the Cadillac of all turntables.  It is enormous and has an incredible amount of electronics, most of which is designed in discrete bipolar transistors.  It would not run at all on 45,  on 33 would run only 16 seconds, and the braking mechanism did not function.  This turntable must hold the record for the most unaccessible and unrepairable product of all times.  The unit would not operate in any orientation but upright and all the electronics were either buried under the top rim or on the bottom.  It took lots of time and clip leads to connect to the PCB and then flip over the turntable to operate and take the measurements I needed to get a lead on what was wrong.
Quote: "Wow, Dave! I can express neither how happy I am nor the degree of gratitude I have. This table has been the bane of my existence for nearly a year now. Finally, the burden is lifted and I can enjoy vinyl again."  He also posted a review of my work at forum.audiogon.com of which the last line is "So, in regards to that, there is some danger in living with this direct drive table, but the world is made less dangerous with Dave in it."
 

JVC TT-101 turntable back at home playing music.
Project: This individual sent me a JVC TT-81 turntable which is the little brother to the JVC TT-101.  It uses a strobe indicator for frequency and has a turn dial for +/- pitch correction.  Although it is less complex, it is worse to work on.  The PCB orientation is reversed so only the solder side is accessible.  It is a single sided PCB so there was no issue with eyelets but the stress on the long connectors had broken and lifted the traces off the PCB.  I used epoxy to glue the sides of each connector to the PCB to provide mechanical strength and then bridged the traces with 30 gauge wire.  I replaced all capacitors and verified the power supplies.  I was never able to locate free schematics for this turntable so I reverse engineered what I needed and then had to solder wires to the PCB to run out under the turntable so I could make measurements.  The latest date code I could find on this turntable was 1985.
Quote:  
 

The restored main circuit board of the TT-81.
Project: This individual sent me a Roland RE-301 Space Echo that was inoperative.  The motor would not spin.  It is a Pioneer M-502E-B02 DC brushless motor with internal hall sensors that control the current to the four windings.  The hall sensors had deteriorated such that the winding currents would no longer switch.  I rebuilt the motor with new hall sensors that I sealed in place and I replaced the bronze bushing and upper bearing while I had the motor apart.  One of the windings in the two track playback head was open so I bypassed it and increased the gain to compensate (both tracks are written with the same mono signal).  I did a number of other minor repairs and spot-checked the calibration.  I cleaned, lubed, and degaussed the tape mechanics and made new tape loops and it operated like new!
Quote: "Wow... that's a lot of work. I thank you SO VERY MUCH. I imagine most people would have sent it to the skip when they saw the level of work it need. I also imagine most techs wouldn't have been capable of doing all the repairs and customizations you did."
  The Roland RE-301 Space Echo Pioneer M-502E-B02 brushless DC motor with new hall sensors, bearing, and bushing.


Custom Design

Project:

Bill requested a special version of my DJB-A440 Reference Oscillator that was selectable to operate at either 440.0 Hz or 440.5 Hz. I modified the software and sent him some programmed parts.  Bill's website is www.dragonflyalley.com
 

Modified DJB-440 with 440.5 Hz output option.

Project:

Alan requested help for a portion of his synthesizer project.  I adapted the software for my MIDI processor to provide a custom split mode function.  Three switches define the split key, one switch enables the split mode, and four switches set the MIDI channel for keys below the split note.  I sent Alan programmed AVR processors and he built the hardware and performed a system verification of the functionality.

Quote:

"It worked first time and I am very pleased with the result.  It does everything we discussed and interfaces perfectly with the M-audio and the Tyros3."
 

Alan's DIY MIDI Split processor.


Audio Restoration and Conversion

Project: This reel-reel tape of a 1970 Christmas broadcast produced by the radio class of Mount Hood Community College in cooperation with KRDR (now KRYN 1230 AM) in Gresham, OR.  I digitized the broadcast and sent the tape and a CD to Mount Hood Community College for their archives.
Contents:

30 minutes

Hosted by Larry Grant

Greeting from Robert R. Carl, College Development Officer

Music from the College Choir directed by Harold Malcolm

Special announcement from Rob Carnaham, Student Body President

Click to listen to the broadcast

Project:

Jason requested help with a transcription disc recording of his grandfather who was interviewed in the Marines on Iwo Jima in 1945.  I took a straight tubular tone arm and made an extended tone arm using 5/16" aluminum tubing.  I had to heat the aluminum tubing so I could bend the 22.5º angle at the cartridge.  I mounted the new arm extended off a turntable so it could play the 16" transcription disc.   I digitized the recording and made audio and data CDs.
 

Rare 16" transcription disc of an interview of  Marines on Iwo Jima.
Click to listen to the interview

Project:

Bob had a 7" recording of his parent's wedding from 1960 and wanted it transferred to CDs and mp3 files.  It was a 3.75 ips 2 track mono recording so I was able to play on my Otari MX-5050-QXH four track.  I digitized, normalized, and equalized the recording and made audio and data CDs.

Quote:

"It's better than I could have imagined.  Thank you so much for doing this.  There won't be a dry eye in the place when they hear this."


2 track mono tape transfer and restoration project.


Fender Amp Cabinet Restoration

Project: This was obviously a local project due to the size and weight of the cabinets.  I restored a 1961 Fender Tremolux cabinet which required new Tolex, grill cloth, and hardware.  These restorations take considerable time but the amplifiers look fantastic when finished.  More pictures are on my Tremolux restoration page.
Quote: "Dave ... what can I say? My God, what a fantastic job! I think you should start doing this 'for a living'. You do such meticulous work. I am very, VERY happy with the way it looks ... matter of fact, I couldn't be happier! (Unless I won the lottery, that is!)"
  A pristine 1961 Fender Tremolux.  More pictures are on my Tremolux restoration page.


Professional Engineering Consultation

Project: I was responsible for Tektronix Regulatory on a global basis and am familiar with RoHS and REACH directives.  Some of my experience dealt with vendors removing lead and leaving pure tin plating over the base metal leading to tin whisker growth.  I also am familiar with zinc whiskers on my Hammond organ tonewheel generator (close-up photos of zinc whiskers can be seen on my zinc whisker photo page and at the bottom of my tonewheel generator photo page).  I helped diagnose and confirm root cause issues for an electro-mechanical component a company was having issues with.  As I began to understand the symptoms I suspected tin whiskers might be a possibility.  I got some part samples and arranged for Scanning Electron Microscope (SEM)  analysis on a Helios Dual Beam FIB (Focused Ion Beam) at the University of Oregon.  An Energy-Dispersive X-raySpectroscopy (EDS) analysis confirmed the whisker was pure tin.  Failure mechanism solved.
 

Scanning electron microscope image of a 4.1 µm diameter tin whisker


home