|
Making PCB Brackets |
|
I am amazed by the brackets or lack of brackets on the DIY modules that I repair. To me a bracket is very important in the long-term reliability and serviceability of the module. I get modules with the PCB mounted only by one corner with one screw, brackets made out of think flexible steel, PCBs stuck on the bracket with double sticky foam tape, and no brackets so the PCB is just dangling from all the front panel wires. The double sticky foam tape makes the module difficult to repair and I wouldn't trust that foam tape to not affect performance especially if it absorbs moisture.
I make my own brackets out of 0.050" aluminum. While I worked at Tektronix I had access to their engineering model shop so I could get scrap aluminum and use the very nice shears, brakes, and Rotex punches. Since I retired I have to do this all at home.
I use 5052 0.050" aluminum for my metal brackets. It is thin enough to mount behind jacks and potentiometers but is easy to form and drill.
Cutting The Bracket
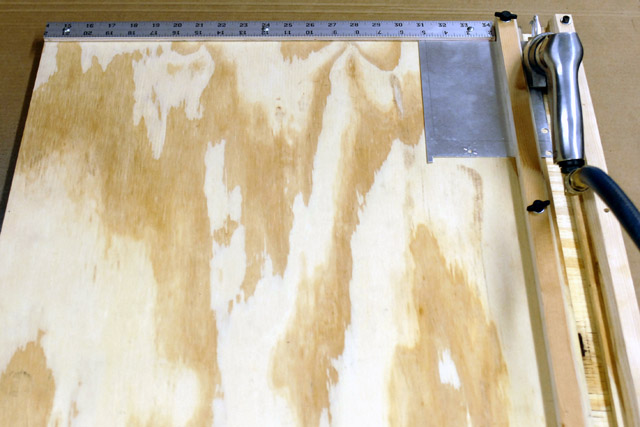
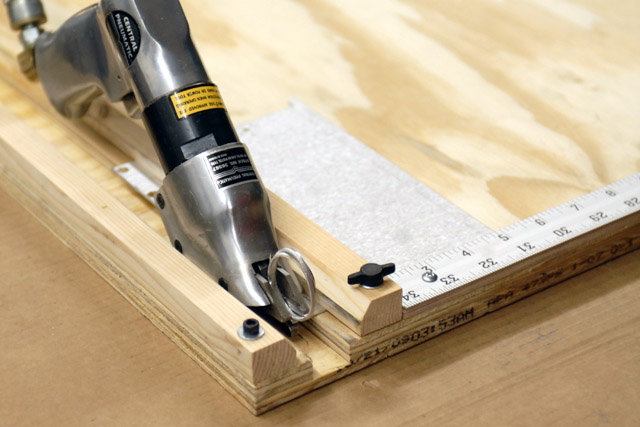
I looked for a small shear or combination brake-shear that would handle 0.050" aluminum (equivalent to 20 gauge mild steel) but couldn't find any. Initially I made a wood jig to hold the sheet metal and cut it with Central Pneumatic air shears. The air shears fit in between the two fences which guide it well but not perfect. The shears can wander slightly so edges are not absolutely straight and sometimes it slightly warps the end. The jig can also be used to cut notches which many of my brackets use to clear front panel jacks and controls.
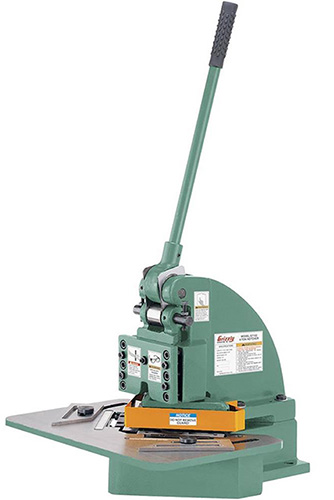
At Tektronix I used a corner shear (for corners) and so I bought a Grizzly G7152 4 ton notcher (which is now discontinued - there must be other inexpensive corner shears available). I use it for my straight cuts as many brackets are smaller than the 6" shear length. If a bracket is longer than 6" I simply make two inline cuts. It works very well. I always cut the height of the bracket to the exact PCB height. I usually add 7/8" to 1-1/4" to the width of the PCB for the depth of the panel to clear jacks or controls. The bent flange is typically 1" wide so a bracket is roughly 2" wider than the PCB.
Here is my Thomas Henry MPS bracket cut. Note the notch to clear panel controls above the bracket.

Forming PCB Brackets
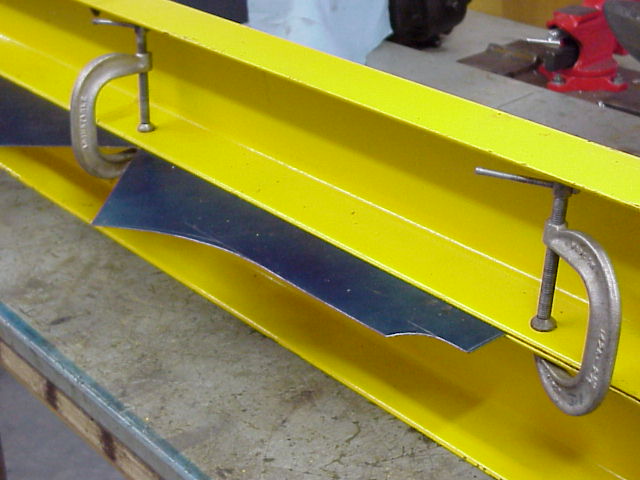
Typically the forming just requires a single 90 degree bend. My original setup was two clamped I-beams to hold the aluminum and then I hammered it down with a piece of wood over the aluminum to protect it. This image shows the I-beam setup for forming a piece of steel for another application.
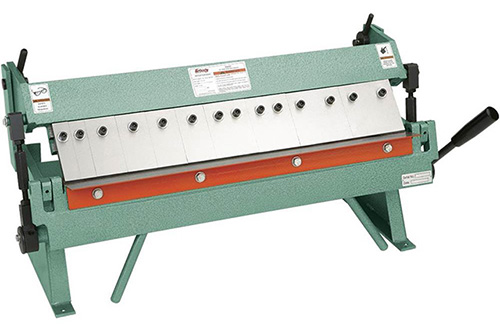
Brakes are reasonably priced so I bought a Grizzly 24" G0557 but they also have a 12" G0556 and Shop Fox makes a 24" M1011. This works very well for forming the bracket.
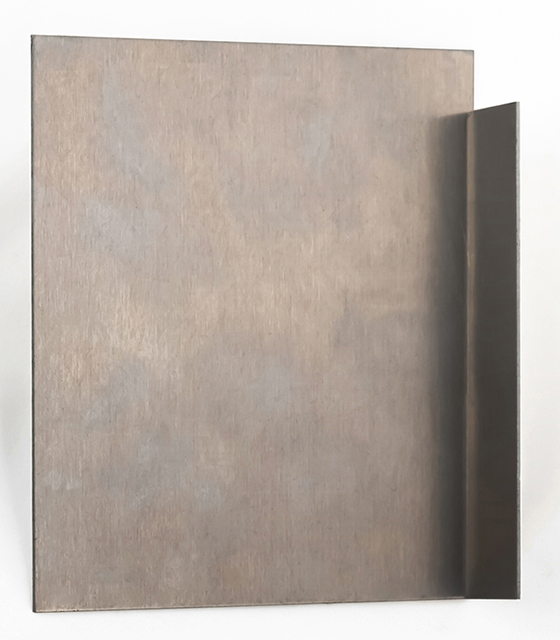
Here is my Thomas Henry MPS bracket formed.
Drilling PCB Brackets
A drill press is a must for drilling round holes. Aluminum is soft so a drill can wander or shift for misaligned or elliptical holes. This is especially true when drilling thicker front panels. For thick panels I use a step drill but for brackets I always use individual drills. I use potentiometers or jacks to mount the bracket and for my designs these are always 3/8" diameter. I line up and mark the bracket holes using the actual front panel. I drill the holes to 11/32" and drill out the center hole to 3/8" and mount the panel with one potentiometer. Then I drill the remaining holes to 3/8" through the panel front so they are perfectly aligned. There is very little waste so the risk of scratching the front panel with chips is minimized.
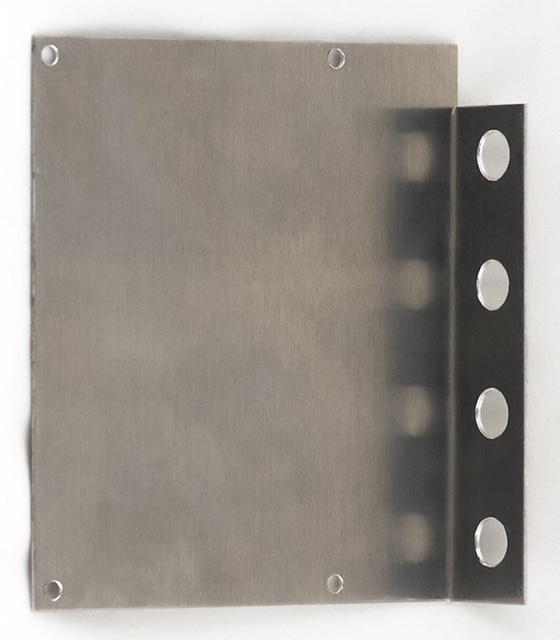
Here is my Thomas Henry MPS bracket drilled.
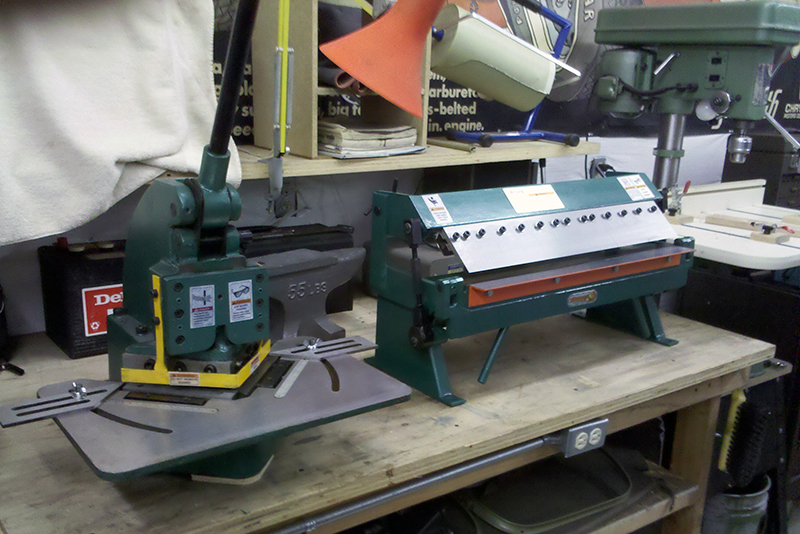
Here is my shop with the corner notch, brake, and drill press setup. I mounted the corner notch on 1/2" plywood on the front and rear so the sides are open so I can push out the pieces that fall through.
Mounting Hardware
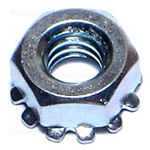
Depending on the PCB mounting hole size I use 6-32 or 4-40 screws. I always use 1/4" standoffs and a 1/2" screw fits the thickness of the bracket, PCB, and standoff. I always use kep nuts on the bracket side to lock the hardware and buy the screws and nuts at the local hardware store.
| PCB Standoffs | ||
| 4-40 plastic standoffs | Mouser | 561-K4.25 |
| 6-32 plastic standoffs | Mouser | 561-K6.25 |
| 6-32 aluminum standoffs | Mouser | 534-3464 |
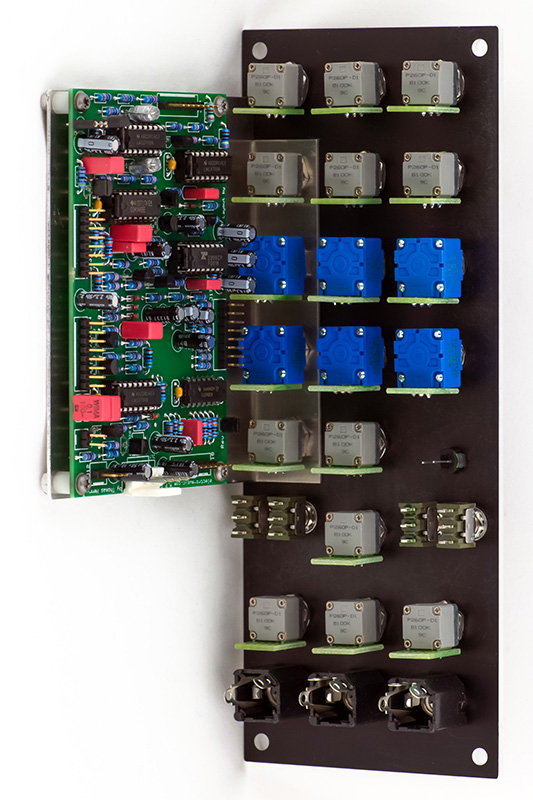
Here is my Thomas Henry MPS module with the PCB, bracket, and front panel controls mounted.